Stick Battles Maps and Arenas
The 7 islands, what kills you that is not a stick, and where the hidden kits hide.
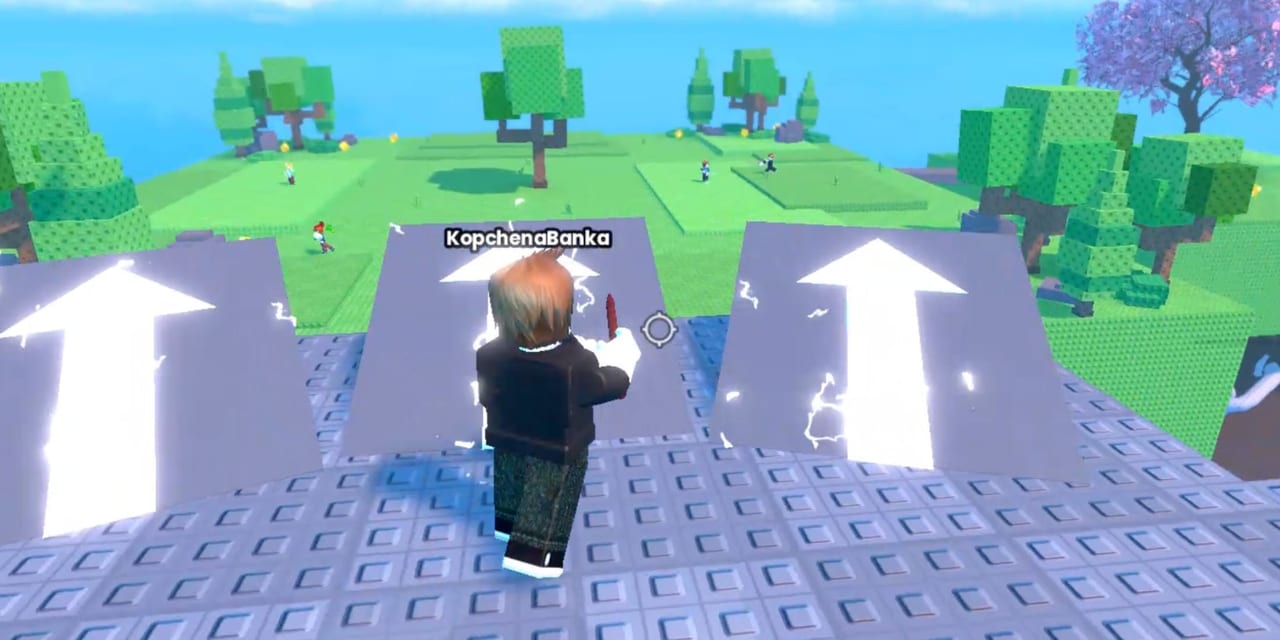
The Stick Battles arena is a multi-island combat zone where 16 players fight with skewers on platforms connected by jumps and geometry. This page covers the map layout, the hazard zones, the hidden stick locations, and the spawn logic that affects your first engagement in every round. Knowledge of the arena is the difference between chasing someone off a ledge and falling into lava yourself.
The game spawns you on the main island. Weather modifies visibility. Lava kills you even when you are winning the fight. The hidden sticks sit in corners most players never visit.
Arena layout - 7 islands
Middle Island (spawn) - The largest island where players load in. This is neutral territory at round start. A sign in one corner kicks you if you click it - a developer joke, not a feature. From Middle Island you can reach most other zones with a well-timed jump. Control of the center matters early because it gives angles on players spreading to the smaller islands.
Left Island (house) - An island with a house structure. Players often overlook it during the initial rush. The geometry provides cover against long-range sticks like Long and Warp. Aggressive players use the house to hide a charge and ambush someone crossing from center.
Right Island (blossom tree) - An island with a cherry blossom tree. Visually distinct and easy to identify from across the map. The tree trunk offers some cover but the island is otherwise exposed. Electric and Gravity users favor this island because the open layout punishes anyone who cannot disengage.
Forward Island (statue) - A forward position with a statue. Long Stick has been reported behind this statue on the second map, reachable with Warp Stick. This is a tourist destination, not a fighting position - the statue itself is not cover. If you have Warp, come here after you have Credits from kills, not before.
North Islands (two islands) - The northern cluster consists of two islands connected by cloud platforms. The first island has a mysterious structure with a teddy bear on top. The clouds between the two islands are a vertical challenge: if you miss the jump you fall back to lower elevation and lose positioning. The second North Island is harder to reach but rewards players who can hold it with sightlines over the center.
Cloud connectors - The clouds linking islands are not solid. They are trajectory guides. Jump too early and you fall. Jump too late and someone catches you mid-air. Cloud-to-cloud movement is where dash sticks dominate because they can skip the commitment window.
Hazard zones
Lava - The floor between islands is lava. The Can’t Touch This badge is literally “die from lava once” - it is a joke and a rite of passage. Lava kills interrupt your streak and reset your Shield. In tight fights near edges, players intentionally bait the throw so you fall in after they die. Watch your spacing when fighting someone near a drop.
Weather modifiers - Blood Moon, Sunset, Gold Moon, and other weather events change visibility and sometimes movement physics. In low-visibility weather, zone sticks (Electric, Gravity, Wall) outperform rush sticks because you need area denial rather than aim. In clear weather, Long Stick and Grapple dominate sightlines.
Hidden stick locations
| Stick | Location | How to reach |
|---|---|---|
| Table Stick | Left or right island | Explore during fights; not behind a locked door |
| Balloon Stick | Upper area | Jump timing required |
| Long Stick | Behind statue on second map | Warp Stick recommended |
| Falling Star | North Islands | High mobility needed |
The hidden sticks are not gated behind combat. You can walk to most of them if you survive long enough to leave the fight. Table Stick is the most common “I found it” report in comments. Balloon requires vertical awareness. Long Stick behind the statue is the hardest find and requires Warp to reach efficiently.
Spawn and rotation logic
Players spawn distributed across Middle Island at round start. The first 30 seconds see the most chaos as 16 players spread to their preferred islands. Holding Middle Island is possible but it draws attention. Most experienced players target an outer island first, then rotate center when the crowd thins.
Tournament rounds start every 25 minutes. The arena does not change during tournaments - the same 7 islands, the same lava, the same weather. What changes is player intent: everyone is fighting for placement, not just for fun. Use the same map knowledge but adjust your target selection from “who is closest” to “who is lowest HP.”
Map knowledge tips
- The sign that kicks you - do not click it.
- Clouds are not solid; they are jump guides.
- Lava is always lethal; respect edges in tight fights.
- Hidden sticks are finds, not combat drops; go find them when you have a streak.
- North Islands offer elevation but cost mobility to reach.
For the full stick unlock list, see How to Get Sticks. For combat advice on specific islands, see How to Win.
Frequently Asked Questions
Quick answers to the most common Stick Battles questions.
How many islands are in the Stick Battles arena?
There are 7 islands total: Middle Island (spawn), Left Island (house), Right Island (blossom tree), Forward Island (statue), and two North Islands connected by clouds.
Where is the hidden Long Stick?
Long Stick has been reported behind the statue on the second/further map. Warp Stick is recommended to reach it efficiently. See How to Get Sticks.
Does the arena change during tournaments?
No. The 7 islands, lava, and weather remain the same. Player intent changes - everyone is fighting for placement rather than casual kills.
What happens if I click the sign on Middle Island?
You get kicked from the server. It is a developer joke, not a feature. Do not click it during a match.